The brakes are one of the most crucial car components. The braking system is always important no matter what. Since the birth of the automobile, automakers have used lots of different types of brakes. Today, we’re talking about the history of automotive brakes, starting in the 1800s. Read on to learn how brakes have evolved into the modern systems we have today.
Wooden block brakes
The first steam-powered cars (and horse-drawn carriages) used wooden block brakes. This rudimentary system used, as the name states, wooden blocks and a lever. The lever forced the wooden block directly onto the vehicle’s steel-rimmed wheel. Doing this created friction, and this is what brought the vehicle to a stop. Wooden block brakes worked as long as the vehicle was traveling around 10 to 20 miles per hour, but no faster.
Wooden block brakes only worked on steel-rimmed vehicles. However, in the 1890s, automakers began to switch over to rubber tires. Wooden block brakes became obsolete, and manufacturers needed a new braking system.
Mechanical drum brakes
In 1899, an engineer named Gottlieb Daimler had an idea. He reasoned that a drum wrapped in cable could stop a moving vehicle if connected to the car’s base frame. Louis Renault took this idea and invented the first mechanical drum brake. Built in 1902, Renault’s brakes are considered the foundation for modern brakes.
Expanding internal shoe brakes
Renault’s model was a huge improvement, but there was a design flaw. Mechanical drum brakes were exterior, meaning that they got exposed to extreme temperatures, rain water, and dirt. This caused them to malfunction. To resolve this, expanding internal shoe brakes were developed. Since this system was housed inside a metal drum, it got shielded from natural elements. Inside of the drum, brake shoes were expanded by pistons. When this happened, they rubbed against the inside of the metal drum. This created friction which slowed down and eventually stopped the wheels from moving.
Braking Hydraulic brakes
The problem with expanding internal shoe brakes was that they required a large amount of force to operate. Luckily, in 1918, Malcolm Loughead invented hydraulic brakes. His four-wheel system used brake fluid to transport hydraulic force from the pedal to the brake shoe. Since
drivers didn’t have to apply as much force with hydraulic brakes, they became popular. Many major automakers switched over to hydraulic brakes by the late 1920s.
Disc brakes
Unfortunately, early hydraulic braking systems often developed leaks. One leak could cause the entire system to malfunction. Additionally, as speed capacities and weights of cars increased, hydraulic brakes became less effective at heat distribution. As a result, auto manufacturers began using disc brakes with hydraulic functions. Disc brakes had been around for some time. They were invented back in 1902 by William Lanchester. They didn’t become popular until the mid-20th century, when they were installed with hydraulics.
Anti-lock brakes
The first anti-lock brakes were invented in the 1920s, and were originally used for airplanes. By the 1950s and ‘60s, car companies started incorporating them as a safety feature. Anti-lock brakes prevent braking systems from locking up when in use. If a lock is discovered by the speed sensors, hydraulic valves take pressure off of a wheel. This prevents the car from spinning, and gives the driver more control. By the 1970s, anti-lock brakes were a popular and affordable safety feature. These days, they’re standard in most vehicles.
Do you need to get your brakes checked out? Our experienced technicians at Dale Feste Automotive are here to help. You can schedule an appointment online, or give us a call at (952) 938-9808. We look forward to seeing you soon.
Everything You Need to Know About Replacing Your Brakes
Many auto maintenance jobs are relatively simple, as long as you have the right tools. Unfortunately, brake replacement is not one of those jobs. Your car’s braking system is very intricate, and you might discover an underlying problem with your system that needs repair. Today we’re going to talk about the general process for brake replacement. Understanding these steps will help you decide if you want to tackle this on your own, or get help from an expert.
Steps to replacing the brake system
In general, auto technicians follow the same process when replacing the brakes:
- Loosen the lugs: Start by activating the emergency brake. Then, use a lug wrench to loosen the lugs, making sure not to completely disconnect them.
- Raise the vehicle: Position the car jack underneath the vehicle’s frame rail. Be sure that the jack stands are placed underneath your car for it to rest on. Then, check that your car is stable and remove the wheels.
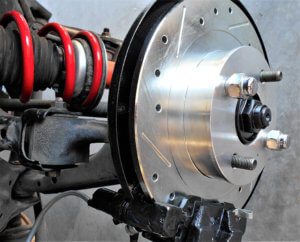
- Slide out the caliper: After disconnecting the bolts, slide out the caliper. If the caliper is stuck, a flat head screwdriver can help pry it out. Rest the caliper on the suspension so you don’t put any strain on the brake lines.
- Remove the caliper carrier: Remove the caliper carrier by disconnecting the bolts that hold it in position.
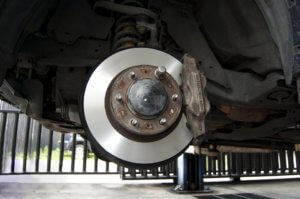
- Remove the rotor: Check to see if your rotor has a rotating screw. If it does, remove it. Once you do, take out the rotor. This step could be challenging, especially if your system has accumulated rust or debris.
- Install new rotor: Wipe off rust from the surface of the hub with a wire brush. Use a degreaser to remove any oily residue on your new rotor, and then install it.
- Assemble caliper carrier: Reinstall the caliper carrier by fastening it with new bolts.
- Compress the caliper: To avoid blowing a line, look to see that the cap is removed from the brake reservoir. Then, compress the caliper by aligning its piston with the housing. A c-clamp and an old brake pad are useful tools for this.
- Install caliper and brake pads: After inserting the brake pads into the caliper carrier, attach the caliper bolts loosely. Next, be sure that the caliper can move without seizing up. Once you’ve done this, tighten the caliper bolts.
- Re-attach the wheels: Reattach the lugs, and once the vehicle is back on the ground, tighten them with a torque wrench.
- Repeat, pump, and break in: Follow these steps for the rest of the wheels on your car. Then, pump the brake pedal about 3 times until you feel pressure in your system. After that, you’re ready to break in your new system. While listening to your car, go through a few cycles of acceleration and gradual deceleration. It’s normal to hear some odd noises at first. However, these will eventually subside if your system is properly installed.
Should I replace my own brakes?
Replacing the brakes is rarely a straightforward task. Unless you are well-versed in troubleshooting brake issues, it’s best to leave this job to a professional. That way, you can rest easy knowing your brakes are in good hands.
Does your car need its brakes replaced? Our experienced technicians at Dale Feste Automotive are happy to lend you a hand. Give us a call at (952) 938-9808, or schedule an appointment online. We look forward to serving you.